OK,
now I'm getting serious about building. This is your typical
loose coupled set with a few more options I built in. I can't
say
the design is original by no means, What I did was take several ideas
from several of the more reputable builders(Mike Peebles, Dan Petersen,
Dave Schmarder) and put them together to make a really nice, versatile
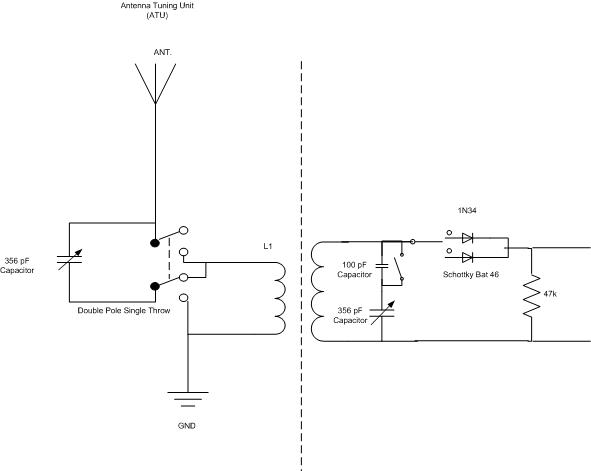
DXer that performs excellent. Starting with the ATU, I used
1/4
inch thick Plexiglas and 24 Guage wire. 45 wraps gives it
about
190 uH according to my LCR meter. The capacitor is a 400pF
and
the DPST switch takes that capacitor from tuning the coil in parallel
or putting it in series with the antenna (see schematic).
The
Main Tuning circuit uses the same spider form but 65 turns which gives
it an inductance of 250uH. I'm using the same type 400pF
capacitor which is connected across the top and bottom of the main
tuning coil. You will notice two switches to the right of the
capacitor. One switch puts a 100pF capacitor in series with
the
variable capacitor. Why you ask? OK, this drops
the over
all capacitance across the coil and lowers the Max capacitance
available. If you were to look at a graph while the variable
capacitor is spun from Max. to Min. you would notice that as you get up
toward the 1000 kHz range, the frequencies start getting real close.
By adding capacitance, you spread out the tuning available on
the
upper end so you don't have issues getting that sweet spot or catching
that hard to get station. The other switch lets you select
between the standard 1N34A germanium or a Schottky Bat Diode.
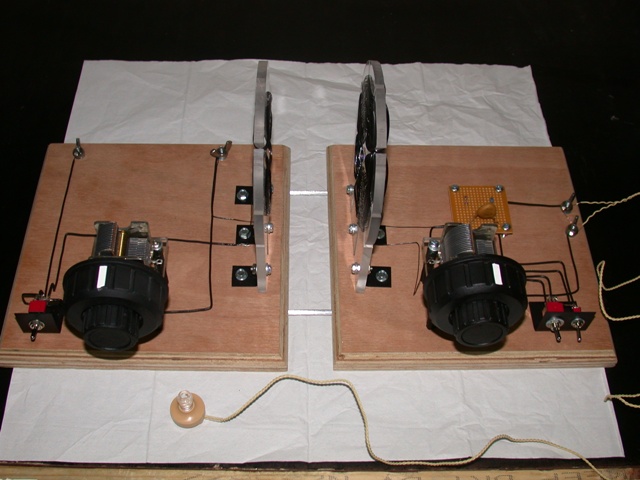
Like the knobs? Well, I was in Iraq when I built
this one
too. What I found was some PVC pluming parts that kind of
fit
together. The very center is a 1" plywood plug cut from a
hole
saw bit and the back is also plugged with plywood. A fresh
coat of flat black paint and there you have it. The last
feature
is the sliding rail system I came up with. Can you see the
two
silver stiff rods? This allows me to vary the coupling
between
the two without the two units getting askew. Once I get settled back in
the states I plan on taking it apart and refinishing the wood
|